Sunday, March 13, 2016

Unexpected Windfall

I've been meaning to write an update for winter/spring 2016, however something has come up that has changed things and takes precedence.

The remnants of the old Chicago, Wheaton & Western have long sat moribund while a reorganization plan was worked out for the refurbishment and rehabilitation of the railroad. Those plans have now been cancelled as the Illinois & Wisconsin Southern has purchased the assets of the CW&W and is now in the process of liquidating parts of the old line. The trolley wire has been removed and, as such, a good deal of rolling stock has now become superfluous.

It is unfortunate about the old road, however the demise of the CW&W has resulted in a tremendous gain for the Dunsel Line: eleven Chicago Aurora & Elgin cars!

Four St. Louis Car Company 450-series cars. The two fitted with Q Car trolley poles (which are actually incorrect for these cars) are powered. The other two are not.

Three Pullman 400-series cars. (One not pictured due to it being unassembled.) All have insulated power trucks. (They came with a spare pair of trailer trucks). One of the two pictured will be 411 and has the correct Baldwin trucks for that car.

Two Niles-built 300-series cars. The one on the left (without trucks pictured) seems to have been through hell. It appears to have all of its parts, but many of them have come loose and/or are severely broken. The parts were stored inside the car body which has a large, rough-cut hole in the floor to permit a large power truck. Neither truck, however, has a motor and one truck is mostly dismantled.

Here we have something of an oddity. This is clearly a Kuhlman 311-series car, but it looks ancient! (Note the arched "rainbow" sash—currently missing the stained glass.) It must have been stored somewhere in the back of Wheaton yard and was never modernized prior to its transfer to the CW&W. This car is a nice little relic that will get a nice Pullman Green paint job.

Another interesting car. This is an ex-Chicago North Shore & Milwaukee Jewett-built parlor car that was transferred to the CA&E in the 1930s but for some odd reason, this car never received the standard modifications that the rest of the set got. This will definitely have to get rectified. This car would have been perfect on the Batavia branch.

Many of these cars were clearly never removed from the box prior to today. Well I've certainly got my work cut out for me.

Wednesday, December 16, 2015

That Was Fast...

So, after only having her for a few days, the Electroliner is out of commission!

A bit enamored with my recent acquisition, I've been checking in on the 'Liner frequently at home to either admire its beauty, assure myself that it is in fact in my possession and not some elaborate dream, or—most frequently—to develop a plan of attack as to how to effect repairs and upgrades. Today I was checking out the tavern-lounge section and wondering about the windows. The booklet that came says: " The 2nd car is the diner with all the electronics and sound, the windows have been frosted to simulate pulled shades." This intrigued me as from what I had seen, my windows did not appear to be frosted and I went in for a closer look.

The floors and interior of each section is held to the body by four screws. For the tavern-lounge, three of these are easily accessible and are removed with minimal effort. If the section is held upside down with the truck at the bottom the fourth screw is in the lower right-hand corner, situated to the right of the truck. This screw has obscured access due to the shape of the sideframes. (The screw on the left side of the truck does not have this issue.) To access the screw, I removed the truck and then the screw came out without difficulty.

Upon opening the model, I discovered that indeed, the windows in my model are not frosted. After getting a good look inside and how the windows are constructed (2 "single" panes which go outside of a double pane and a triple pane for the opposite side) I put the section back together starting with the screws. The truck is mounted to the body by a screw which passes through a spring and the bolster. The screw connects with a short threaded tube which is part of the underframe. The threaded tube is also the mounting point for the next section.

When reattaching the truck, I applied too much force to the screw (all I was trying to do was make it snug) and the threaded cylinder came off of the underframe. This is very unfortunate (to put it mildly).

The cylinder (in black) is still attached to the screw for the truck.

As I see it, I have two options. 1) Attempt to solder the cylinder back onto the underframe or if that doesn't work, 2) contact Sunset and see if I can get a replacement underframe for the lounge section.

Either way, the 'Liner is going to look a little funny for a while.

Sunday, December 13, 2015

I Won't be Eating Any Time Soon

So I went to a model railroad/railroadiana show today with my father. This was a last minute affair and I had precisely zero expectation of finding anything of interest. For the most part the show lived up to my expectations, but toward the end I saw something and the more I looked, and the more I asked, the higher my interest became. I'll admit it: I actually became light-headed for a while. Then I walked away and finished the show. Upon completion, I promptly came back and bought it.

Now arriving at Adams & Wabash...

At this length, I won't be running her on the North Side embankment any time soon.

This is a two-rail Sunset Electroliner 803-804. (My father has the 801-802—and, as he pointed out, the substitute liner—so now we have a "complete set.") I don't think she was ever taken out of the box. Apparently, she garnered some attention at the show, but kept getting passed up because she isn't the three-rail version. So much the better.

She does have some problems. Almost all of the window glasses have fallen out or are on the verge of falling out. I knocked a few out myself when my fingers barely brushed up against them. The grab irons on one unit are also bent inward. Neither is a major issue. And for $600 I'm in absolutely no position to complain!

The window on the left is still in place, while the two on the right have fallen into the car.

Not a Pulitzer caliber photograph, but it will do to get the point across. The hazy lines running between window openings are the tops of the window glasses which have fallen out. The passenger seated here doesn't seem to have noticed.

The bent grabirons should be easily fixed by teasing them into place with a pair of needle-nose pliers.

Now I've got to get her set up for DCC and overhead operation.

Sunday, November 22, 2015

Interesting Article

734 Electric Railway Journal Vol. 154, No. 20

Construction Begins on Dunsel Line

Sources close to the company have reported that construction has begun on the Dunsel Line. The company has acquired a right-of-way 60 ft. wide through Edgewater. The 0.05-mile line now under construction will have four tracks elevated approximately twelve feet above ground. These will rest on a solid-fill embankment with concrete retaining walls.

Chief Engineer Leif DeFurst has said that no special track work will be required at present. Mr. DeFurst went on to say that tracks and ties will be ordered as soon as possible. These are expected to be of the prefabricated type utilizing code 125 rails of nickel-sliver. In all, there will be four tracks such that when the line is completed, there will be dedicated local and express tracks in each direction over this segment of the line.

Plans for the new road call for third rail electrification along its lines. Code 100 nickel-silver rails of the standard type will be employed. The top of the third rail will be situated 6-½" above the top of the running rails and the center line of this rail will be 20-1/8" from the inside of the running rail so as to be of the same type currently employed on all the rapid transit lines in Chicago. This means that upon completion, the new road will be unable to host cars from other roads not so equipped. Chief Engineer DeFurst has stated that erection of standard trolley wire over the westernmost track is being considered, but is not an immediate goal.

Monday, October 19, 2015

Arches

I've been behind on updates since July and now I've got to try to catch up.

In addition to beginning work on the 5000, I also acquired new project. Back in October 2014, I purchased a set of Walthers North Shore ends on a whim. I had no plans for them and figured they might be useful down the road for trading or something. Later I was able to acquire a Walthers arched roof and mats. Again, purchased them only because they were available and decently inexpensive. (It should be obvious where this is going.) A few months ago I found a pair of Walthers “interurban sides” that were appropriate for a North Shore car. My new project is to assemble and complete this Walther’s North Shore kit. The car sides (specifically the window arrangement) put this car in the high 700s. I haven’t decided whether or not this car will be powered or even if it will be part of the Skokie Valley or Shore Line trains. It’s a low priority project; something for the backburner. In an email blast a while back, I saw a picture of a North Shore car built from a Walthers kit on the Salt Creek Lines. I’ve forgotten who built it, but it looked superb and betrayed nothing of its rather average beginnings. With the right amount of effort, I have high hopes that my planned car will look as good.

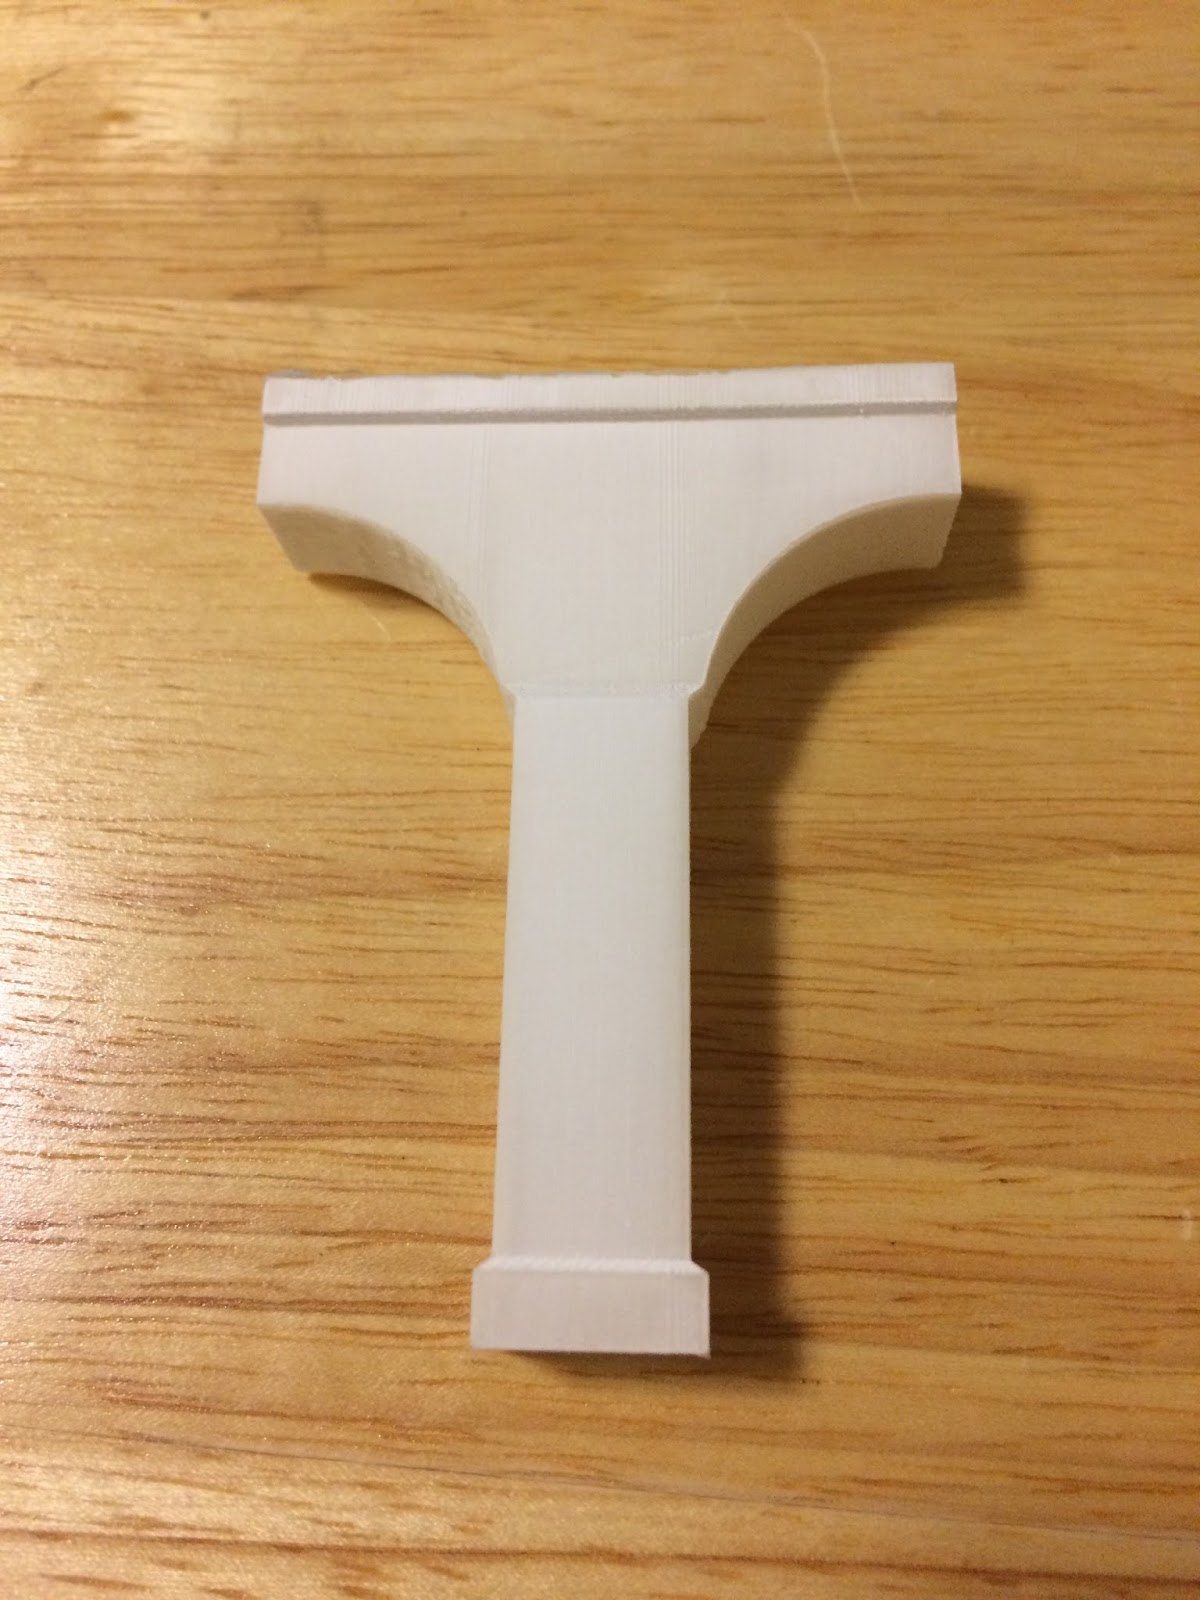
I've also done some 3D modeling. I went back and decided on a shape for the arches atop the support columns under the viaduct. I settled on useing a circle to create the curve of the arch although the shape of the actual arch is closer to a vertically squashed semicircle. The idea here is to make a mold of a 3D printed master since I’ll need fifteen middle columns and six end columns for the viaduct. I am yet to determine a method of actually doing this and I’ve also yet to select a material.

Circular arches. The green is simply a marker for how high the curb/sidewalks need to be and is not part of the model.

Once a suitable interior shape was developed to make the structure hollow (done to keep costs low[er]) I had it uploaded to Shapeways and printed. As soon as this went through, I suddenly realized a miraculously simple way of producing the "squashed semicircle" shape for the arches that I wanted. All that's required is drawing a circle and then rescaling it vertically, but not horizontally. The result is an oval.

"Squashed" arches. The difference is subtle, but the arches are a much closer match.

Meanwhile, the original design was printed and shipped out. The results were... less than optimal.

Looks okay so far.

Oh. That's not right.

Not sure where the surface stuff came from, but that should be easily sanded off.

It's difficult to see, but the piece is actually slightly curled.

I'm actually not too worried about it since the arches need to be redone anyway.

Tuesday, September 29, 2015

Beginning on the 5000

Over the past few months I've been doing a bit of project hopping.

I stepped away from 3D modeling to do some “real” modeling. This has focused on the 5000 series Skokie Car. I’ve had this thing for several years and I finally started doing something with it. Prior to painting (which would be done best with an airbrush—a tool not currently within the Dunsel Line shops) the car needs to be primed.

Brass models often come with a protective coating so that they arrive in the eager hands of the modeler with a crisp, glossy luster. While this coating keeps the brass free of surface imperfections, it impedes the painting process and therefore needs to be removed.

My 5000 no longer had the glimmering brilliance it must have had when it was new and had developed a few tarnish spots in. As such, I wasn’t sure if the brass had the protective clear coat on it. Going the safe route, I “removed” it anyway. The method here was a breadbox filled with thinner. (I actually got this breadbox while on the IRM Highliner fundraiser. It’s officially traction related!) I started with the middle section as this requires no prep work, unlike the ends. The body and underbody/floor were soaked separately in the bath for 24 hours before being brushed off and cleaned. Interestingly, there was no gel coating left on the parts after the bath (as I was expecting) however there was a distinct color change in the thinner, so I’m left to assume that there was a coating on the brass.

Dis is what happens when you displeases da boss, see? You sleep wit da lacquer thinner fishes, chump!

Before I repeat this process with the ends, I need to remove the trolley pole shrouds and roof boards. This will require a soldering iron which will be acquired in the immediate future.

Once both pieces of the middle section were dry, they were primed with Tamiya light gray primer.

I also ordered the replacement wheels for the unpowered trucks. As delivered, these cars came with resilient wheels but by the time they were assigned to the Skokie Swift, these wheels had been replaced. (Since I need the car to be 2-rail operable, the wheels have to be insulated and therefore replaced anyway.) A quick search of Chicago-L.org shows that the 5000-series were equipped with 26” wheels so I acquired a set of 26” flush axle wheels from NorthWest Short Line.

I quickly installed them on the two trailer trucks and (aside from the faces needing to be painted silver) they look great. There is, however, one problem. The wheels supplied with the model aren’t the same size as the NorthWest Short Line wheels. They’re slightly larger, a difference which is only really noticeable when you have both sets in hand. The new, smaller wheels cause the truck to sit marginally lower. Unfortunately, this is just enough to cause the “hanging” track brake to rub against the rails. Other than switching to 28” wheels, I don’t have a solution at present.

A front truck with original wheels and tread-gap as seen under poor lighting conditions

A middle truck with replacement wheels and no tread-gap under the same poor lighting conditions

With an unusual bit of forethought on my part, shortly after buying the model, I ordered an interior kit from Q Car. The seats have all been cleaned and primed. I tested one seat with a can of Rustoleum chrome for the metal parts and I find it passable. Only this one seat has been done in this way since I haven’t been bothered to start the tedious process of masking all the other seats yet.

Friday, August 14, 2015

Pantographs and Trolley Beams

Strap in! It’s a long one.


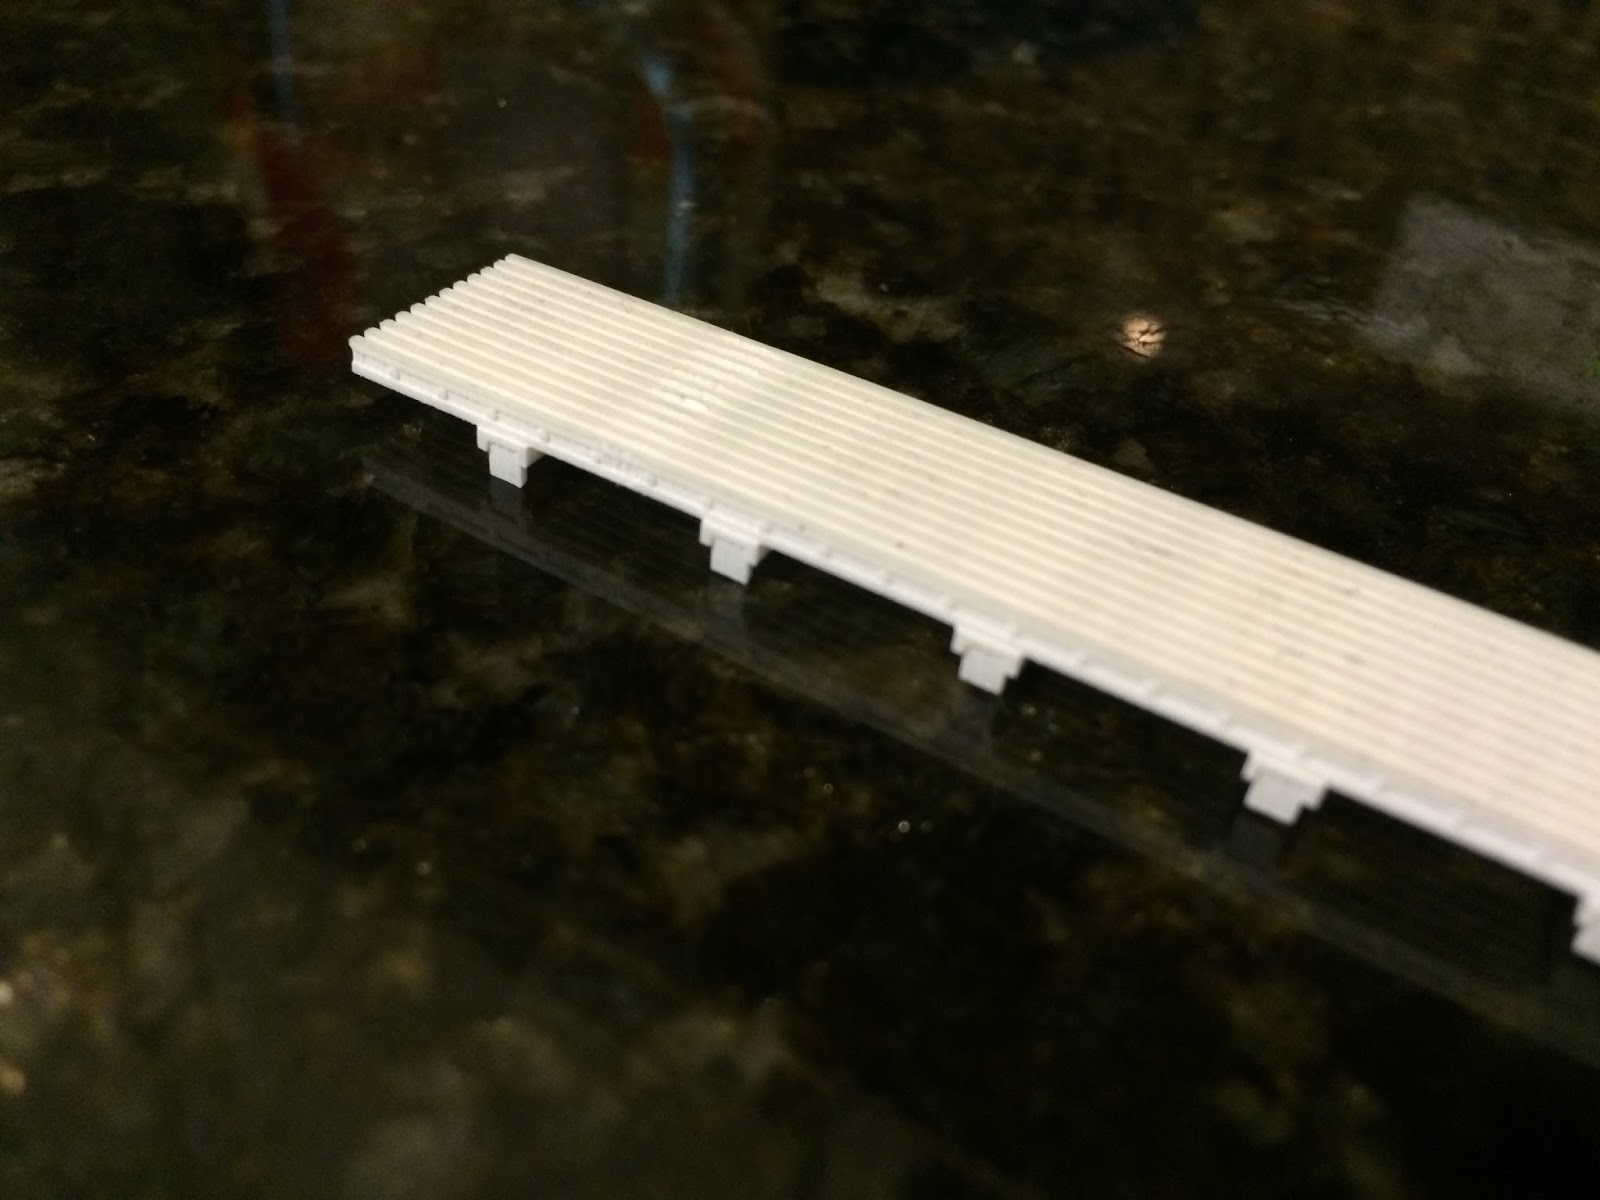
Since May I’ve made some headway on a number of projects. 3D modeling continues as always and on July 9, I received the first print of the experimental roof walks for the 3200 series cars. The walks in question are only the rear half, the portion that is only half-width. This was done as a cost saving measure for the test article.

The plan was to see how these came out and then work on and produce the front half which supported the pantograph. The two sections will line up and be glued together to form one complete piece. Instead of attempting to match the curve of the MTH roofs, I made the support brackets slightly longer than needed. Once glued together, I’ll place a piece of sandpaper on the roof and then gently rub the roof walks back and forth on top until they conform to the shape of the roof.

Unfortunately, after looking at the piece and being wholly satisfied with it, I began work on the forward portion only to discover that it would be visibly too wide for the car. To fix it, I needed to reduce the gaps between the horizontal members by 0.2mm each. Since the rear portion and the front portion have to line up, this meant that the rear portion needed to be narrowed as well, rendering the original one unusable.

I was able to make the rather tedious corrections relatively quickly and sent off for an updated version. Thankfully Shapeways was having a short term deal where shipping is free.

The narrowed rear portion of the roof walks arrived on the 16th and it definitely looks better than the original. The downside is that this was the first piece that I’ve gotten with some kind of a printing error. It arrived with a globule of “white stuff” which went across and between the slats in one section.

This didn’t come off while soaking in Bestine but did come off afterward after being cleaned with an old toothbrush under running water. Some of the slats were damaged (either in production or during cleaning—impossible to tell which) and from certain angles this shows. This end also has a strong odor of cherry syrup, which is highly unusual since 1) none of the other pieces have had this smell and 2) I can actually smell this with my barely functional nose! (The fact that I can smell it really attests to the strength of the smell.)

Otherwise, the piece came out well.

The damaged area is slightly visible from this angle. It is between the first and second supports on the left. In removing it, some of the top portion of the walk was damaged.

The original is at top. The newer one has been soaked in Bestine, giving a clear demonstration of what the agent does to Frosted Ultra Detail. Again, damage is visible here.

Tying in with the roof boards, my father and I took a trip out to the Illinois Railway Museum on Wednesday, July 8. While there, I was able to locate the pantographs from the 3200s and get some preliminary measurements. Now that I know where they are, I’ll be sure to acquire a very detailed set of measurements to be able to build the correct ones myself.

Progress has also been made on a new set of trolley beams for the same cars. I’m still working on perfecting the design of the third rail shoes themselves, but the equipment supporting the shoe has been designed and printed. This is a test to see how Frosted Ultra Detail handles separate-but-interlocking parts. (I would feel immensely satisfied if I could manage to produce dangling third rail shoes that could also glide on top of a rail.) If this fails, I can at least manufacture a set of trolley beams for the 3200s that don’t have provision for sleet scrapers on the rear trucks, as is prototypical.

The test piece also arrived on the same day as the narrowed roof walks. The two loops which hang down and connect to the third rail shoe do dangle, but not as freely as I’d hoped. Soaking them in a bath of Bestine did help, as did working them a bit, but they still don’t swing completely freely. I’m hoping there’s some kind of lubricant I can try to make them work better. I’d rather not resize the parts to improve “functionality” as areas on this piece are already pushing the limits of Frosted Ultra Detail in terms of minimum width and also because this would alter the look of the piece.

Perhaps it’ll work better once the shoe itself is added. Fingers crossed.

I actually printed this piece in Frosted Extreme Detail (which is the same material as FUD, but printed with thinner layers). The difference in cost for such a small piece ended up being 10¢ and I figured a dime was worth the expense of finding out what the big deal was.

Ultimately I don’t see too much of a difference and it certainly doesn’t seem to be worth the extra cost for larger pieces.


Additionally, I purchased a pair of Japanese pantographs from the East Gary Car Company. These pans are supposed to be junk, but as it’s the shoes I’m interested in, that doesn’t matter. I am fortunate enough to know someone who has a small, but overfilled workshop. He had a spare rotary tool (Ryobi, not Dremmel) that he didn’t want taking up space and he gave it to me. (One tool down that I don’t have to purchase!) Using this, I have already cut apart the shoes on one of the pans. (So far no complaints about the Ryobi.) These shoes (of which there will be four in total) will be for the 1-50 and 5000 series trolley pans. I still need to gather more information on the trolley pans before continuing much further down this road.

One of the big things holding me back on the 1-50 (car 2) and the 5000 (car 52) is my lack of a soldering iron. I’ll need this not only for the construction of the trolley pans, but also to remove the existing roof boards on both cars. I’m already stretching money a bit so this isn’t something I’ll be purchasing in the immediate future.

A tase of things to come

Still, progress continues. The middle section of car 52 doesn’t (and never did) have roof boards since there never was any trolley equipment located there. This makes the middle section an ideal place to start. I’ll prime this section as soon as possible.

The wheels on the 52 are another issue. As built, the 5000 series cars were equipped with resilient wheels. By the time the cars were assigned to the Skokie Swift and rebuilt, these wheels had been replaced with standard equipment.

The trucks supplied with the car are correct in appearance (they’re actually a fair sight better than the CTA 6000/1-50 Clark B3 trucks from Q Car) so I’ll be keeping these and replacing the resilient wheels currently on the model with “regular” 26” flush wheels from NorthWest Short Line. I haven’t decided on what to do with the power trucks yet. (I’m not even sure that the wheels are insulated. I have a strong doubt that they are.)