Showing posts with label New cars. Show all posts

Sunday, March 13, 2016

Unexpected Windfall

I've been meaning to write an update for winter/spring 2016, however something has come up that has changed things and takes precedence.

The remnants of the old Chicago, Wheaton & Western have long sat moribund while a reorganization plan was worked out for the refurbishment and rehabilitation of the railroad. Those plans have now been cancelled as the Illinois & Wisconsin Southern has purchased the assets of the CW&W and is now in the process of liquidating parts of the old line. The trolley wire has been removed and, as such, a good deal of rolling stock has now become superfluous.

It is unfortunate about the old road, however the demise of the CW&W has resulted in a tremendous gain for the Dunsel Line: eleven Chicago Aurora & Elgin cars!

Four St. Louis Car Company 450-series cars. The two fitted with Q Car trolley poles (which are actually incorrect for these cars) are powered. The other two are not.

Three Pullman 400-series cars. (One not pictured due to it being unassembled.) All have insulated power trucks. (They came with a spare pair of trailer trucks). One of the two pictured will be 411 and has the correct Baldwin trucks for that car.

Two Niles-built 300-series cars. The one on the left (without trucks pictured) seems to have been through hell. It appears to have all of its parts, but many of them have come loose and/or are severely broken. The parts were stored inside the car body which has a large, rough-cut hole in the floor to permit a large power truck. Neither truck, however, has a motor and one truck is mostly dismantled.

Here we have something of an oddity. This is clearly a Kuhlman 311-series car, but it looks ancient! (Note the arched "rainbow" sash—currently missing the stained glass.) It must have been stored somewhere in the back of Wheaton yard and was never modernized prior to its transfer to the CW&W. This car is a nice little relic that will get a nice Pullman Green paint job.

Another interesting car. This is an ex-Chicago North Shore & Milwaukee Jewett-built parlor car that was transferred to the CA&E in the 1930s but for some odd reason, this car never received the standard modifications that the rest of the set got. This will definitely have to get rectified. This car would have been perfect on the Batavia branch.

Many of these cars were clearly never removed from the box prior to today. Well I've certainly got my work cut out for me.

Sunday, December 13, 2015

I Won't be Eating Any Time Soon

So I went to a model railroad/railroadiana show today with my father. This was a last minute affair and I had precisely zero expectation of finding anything of interest. For the most part the show lived up to my expectations, but toward the end I saw something and the more I looked, and the more I asked, the higher my interest became. I'll admit it: I actually became light-headed for a while. Then I walked away and finished the show. Upon completion, I promptly came back and bought it.

Now arriving at Adams & Wabash...

At this length, I won't be running her on the North Side embankment any time soon.

This is a two-rail Sunset Electroliner 803-804. (My father has the 801-802—and, as he pointed out, the substitute liner—so now we have a "complete set.") I don't think she was ever taken out of the box. Apparently, she garnered some attention at the show, but kept getting passed up because she isn't the three-rail version. So much the better.

She does have some problems. Almost all of the window glasses have fallen out or are on the verge of falling out. I knocked a few out myself when my fingers barely brushed up against them. The grab irons on one unit are also bent inward. Neither is a major issue. And for $600 I'm in absolutely no position to complain!

The window on the left is still in place, while the two on the right have fallen into the car.

Not a Pulitzer caliber photograph, but it will do to get the point across. The hazy lines running between window openings are the tops of the window glasses which have fallen out. The passenger seated here doesn't seem to have noticed.

The bent grabirons should be easily fixed by teasing them into place with a pair of needle-nose pliers.

Now I've got to get her set up for DCC and overhead operation.

Monday, October 19, 2015

Arches

I've been behind on updates since July and now I've got to try to catch up.

In addition to beginning work on the 5000, I also acquired new project. Back in October 2014, I purchased a set of Walthers North Shore ends on a whim. I had no plans for them and figured they might be useful down the road for trading or something. Later I was able to acquire a Walthers arched roof and mats. Again, purchased them only because they were available and decently inexpensive. (It should be obvious where this is going.) A few months ago I found a pair of Walthers “interurban sides” that were appropriate for a North Shore car. My new project is to assemble and complete this Walther’s North Shore kit. The car sides (specifically the window arrangement) put this car in the high 700s. I haven’t decided whether or not this car will be powered or even if it will be part of the Skokie Valley or Shore Line trains. It’s a low priority project; something for the backburner. In an email blast a while back, I saw a picture of a North Shore car built from a Walthers kit on the Salt Creek Lines. I’ve forgotten who built it, but it looked superb and betrayed nothing of its rather average beginnings. With the right amount of effort, I have high hopes that my planned car will look as good.

I've also done some 3D modeling. I went back and decided on a shape for the arches atop the support columns under the viaduct. I settled on useing a circle to create the curve of the arch although the shape of the actual arch is closer to a vertically squashed semicircle. The idea here is to make a mold of a 3D printed master since I’ll need fifteen middle columns and six end columns for the viaduct. I am yet to determine a method of actually doing this and I’ve also yet to select a material.

Circular arches. The green is simply a marker for how high the curb/sidewalks need to be and is not part of the model.

Once a suitable interior shape was developed to make the structure hollow (done to keep costs low[er]) I had it uploaded to Shapeways and printed. As soon as this went through, I suddenly realized a miraculously simple way of producing the "squashed semicircle" shape for the arches that I wanted. All that's required is drawing a circle and then rescaling it vertically, but not horizontally. The result is an oval.

"Squashed" arches. The difference is subtle, but the arches are a much closer match.

Meanwhile, the original design was printed and shipped out. The results were... less than optimal.

Looks okay so far.

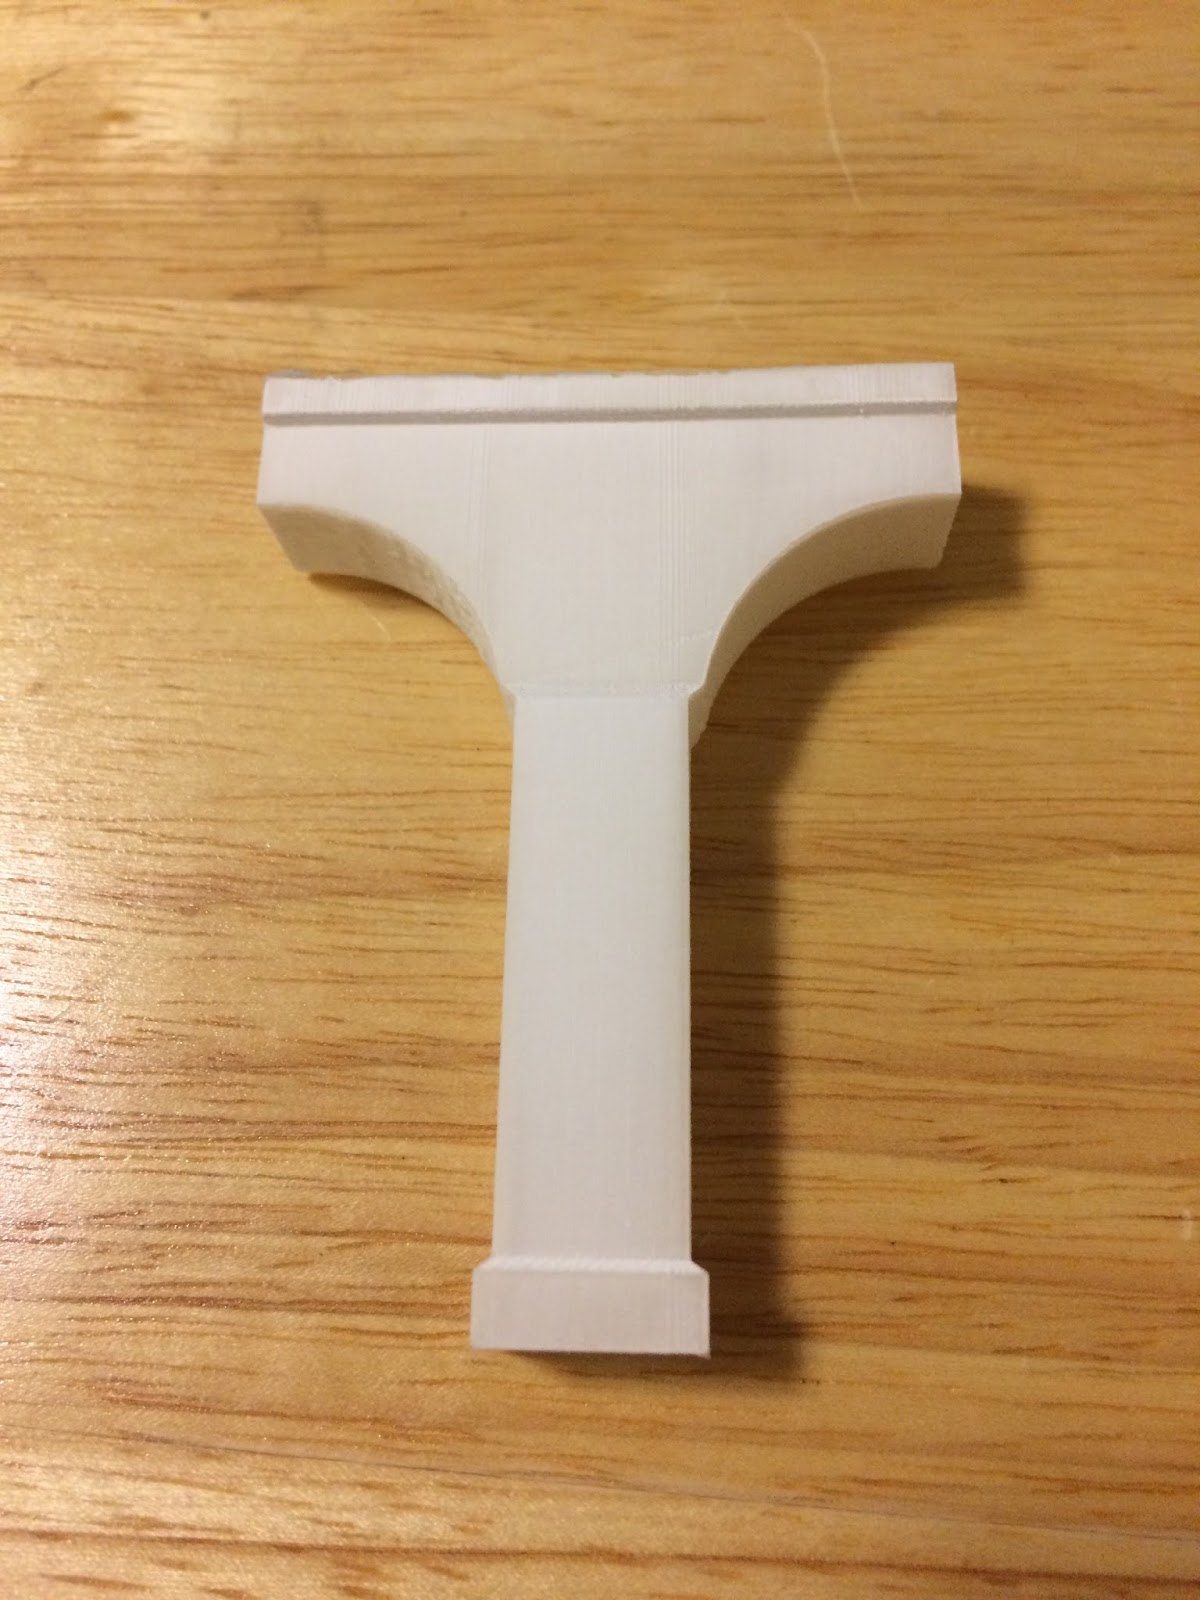
Oh. That's not right.

Not sure where the surface stuff came from, but that should be easily sanded off.

It's difficult to see, but the piece is actually slightly curled.

I'm actually not too worried about it since the arches need to be redone anyway.

Tuesday, March 31, 2015

March in Review

Let’s get straight to the point; I spent a lot of money this month. Even though I’d planned on spending a good deal of money on models this month, my actual total greatly exceeds my anticipation (and this doesn’t even cover routine things like food and bills). I had a number of other projects (not model related) that also cost more than expected, so April will almost certainly be a very quiet month around here.

With that said, it seems like a good time to stop and reflect on a very expensive (but good) month. March is the month of the Chicago O Scale Meet (also known as the March Meet) and associated open houses at various trolley layouts. Preparation for these two prompted me to get back in gear and begin working on the 3D model of CTA’s form 5 coupler.

Ultimately this design wasn’t finalized in time for the open houses (I was only able to attend one) and the design work is still ongoing. The continuation of this project should be a nice one to carry on into April.

Before the meet I was able to get my hands on a Clouser North Shore steel coach. Although it did not come with trucks, I did get a good deal on it and am very happy with my purchase. The following week was the March Meet and there I bought a brass North Shore 170-182 series coach. Acquisition of this car has enabled me to outline and define my projects for the North Shore Line. I’d already decided on modeling the North Shore circa 1952/1953 (the same years for the CA&E) and the addition of these two older steel cars has led me to separate my efforts into the creation of two trains: Chicago-Milwaukee via Skokie Valley (the combine and upper 700) and a Chicago-Waukegan Shore Line train (the “older” coaches).

I have already ordered a motor truck set that would be applicable to either car on the Skokie Valley train, so I’m waiting for that to arrive. I’ll have to construct a test track pretty soon, which I suppose will be the very beginnings of my layout.

Also at the O Scale Meet I bought a pair of pantographs to turn into sausage. The shoes on these will be cut apart, to produce four “single” pantograph shoes. Each of these will be mounted at the end of a pair of four-spring horizontal trolley poles. I still need to buy a total of eight trolley poles for car 2 (the 1-50) and car 52 (the 5000) to make this. As a result of... overspending... I probably won’t begin this phase of that project in April.

After the March Meet I went back and made complete 3D models of the 3200-series snowplows. After increasing the size of the nuts so that they would register at Shapeways, these were sent off to the printer. They arrived on Monday and I am extremely pleased with the results. I’ve already made these available via the Ravenston Car Company at Shapeways. (Shameless self promotion!)

In continuing work on the 3200s, I ordered a set of wheels from NorthWest Short Line. I had planned on mounting these inside of cheap, temporary trucks (shop trucks) but I’ve abandoned this idea in favor of 3D printing my own set of “test trucks” which will enable me to try a few things out and see how well this will actually work. Unfortunately, 30” wheels are on backorder for about a month, so this particular project will probably have to wait for a while. In the meantime I’ll see if I can gather some pictures of the Duewag trucks with which the cars are equipped.

I know someone who claims (strong emphasis on “claims”) that he has access to equipment to make metal casts and, if all goes well, I should be able to make molds of the 3D prints and produce a series of metal trucks.

Even after the end of the March Meet March continued to be a money spender! I found another brass 1-50 series car and didn’t hesitate to grab it. To model the four basic iterations of Skokie Swift equipment as planned, I need a total of three of these cars: one as for a single-unit 1-50 and two for a double-unit 60. I now have two.

My first 1-50 has a dent on one end which I should be able to hammer and fill back into shape. Regardless of how well this turns out, the original (dented) 1-50 will now be used as part of the 60 pair with the dented face being positioned between the cars to minimize its visibility. The new car will now be the single and will get the CTA designed trolley-pans.

I also started work on a 3D model of the resistor grids for the 3200 series. This model uses measurements taken from the pair of 2400-series cars at the Illinois Railway Museum. There are subtle differences between the 2400 and 3200-series equipment that I have to account for and I’m currently working with the design to get it right.

The benefit of creating this model in full scale and then reducing it is that it can effectively be used to create specific models for the 2400, 2600, and 3200-series cars with only minor variations in each and scaled appropriately to 1:45 for the 3200s and to 1:48 for my planned 2400s and 2600s.

The 2200-series cars (which I have already started designing) used a resistor set that was substantially different than those used on the later cars. During my last trip out to IRM, I didn’t take underbody measurements for the 2200s, so I won’t be able to continue work on that particular set until I make another trip out to Union.

Finally (my wallet has its fingers crossed that this really is finally) I found a power truck set that would be appropriate for either car in the Skokie Valley train. It matches the truck I ordered from NorthWest Short Line, although at present I don’t know if the motors are Magic Carpet IIs or IIIs. The main impetus for getting this truck was the fact that I was able to get it for a substantially lower price than normal.

Moving forward into April my projects are most likely going to be all 3D modeling as this can be done at no cost. I plan to finish the form 5 coupler, work out the kinks with the resistors, and begin creation of an underbody set for a 2400-series pair (since I have photos and measurements on hand for that). I’ll also be continuing to fabricate the replacement car floor for the second 3200-series car.

Tuesday, March 17, 2015

The March Meet

This past weekend was the weekend of the O Scale Meet (also known as the March Meet) and I was not going to miss it.

I arrived on Saturday, March 14, about an hour and a half after opening. I was delayed due to celebrating “pi day” by having a slice of pie at 9:26:53 a.m. (3/14/15 9:26:53—or 3.141592653—being the first ten digits of pi.) As always, I was on the hunt for more CA&E, North Shore, and “L” rolling stock and I was armed with a fat wad of twenty dollar bills in my pocket. As such, I was prepared to come and not find anything of particular interest.

Instead, almost immediately I was shown by a member of what my father has dubbed the "Trolley Mafia" to three brass North Shore models by MTS Imports. (I'm terrible with names and I've forgotten his. One of these days this will be the death of me.) Two of the models were early steel coaches from the 1920s with the double-width upper sash windows. As I've decided to model the North Shore circa 1952-1953, these were of no interest. The third was of an appropriate era and I decided to come back to it.

The traction selection was actually quite decent this year, although I did not see any "L" cars for sale. (I later discovered, much to my chagrin, that a pair of 1-50 series cars were sold the previous day—while I was at work.)

I did come across a pair of CA&E 450 series kits, another Clouser coach, and a North Shore wood (one of the ones that made it to the CA&E) but ultimately passed on these as my father already has four (unfinished) 450s and at least one North Shore wood. Instead I returned and purchased the third MTS Imports North Shore coach, a 170-182 series coach.

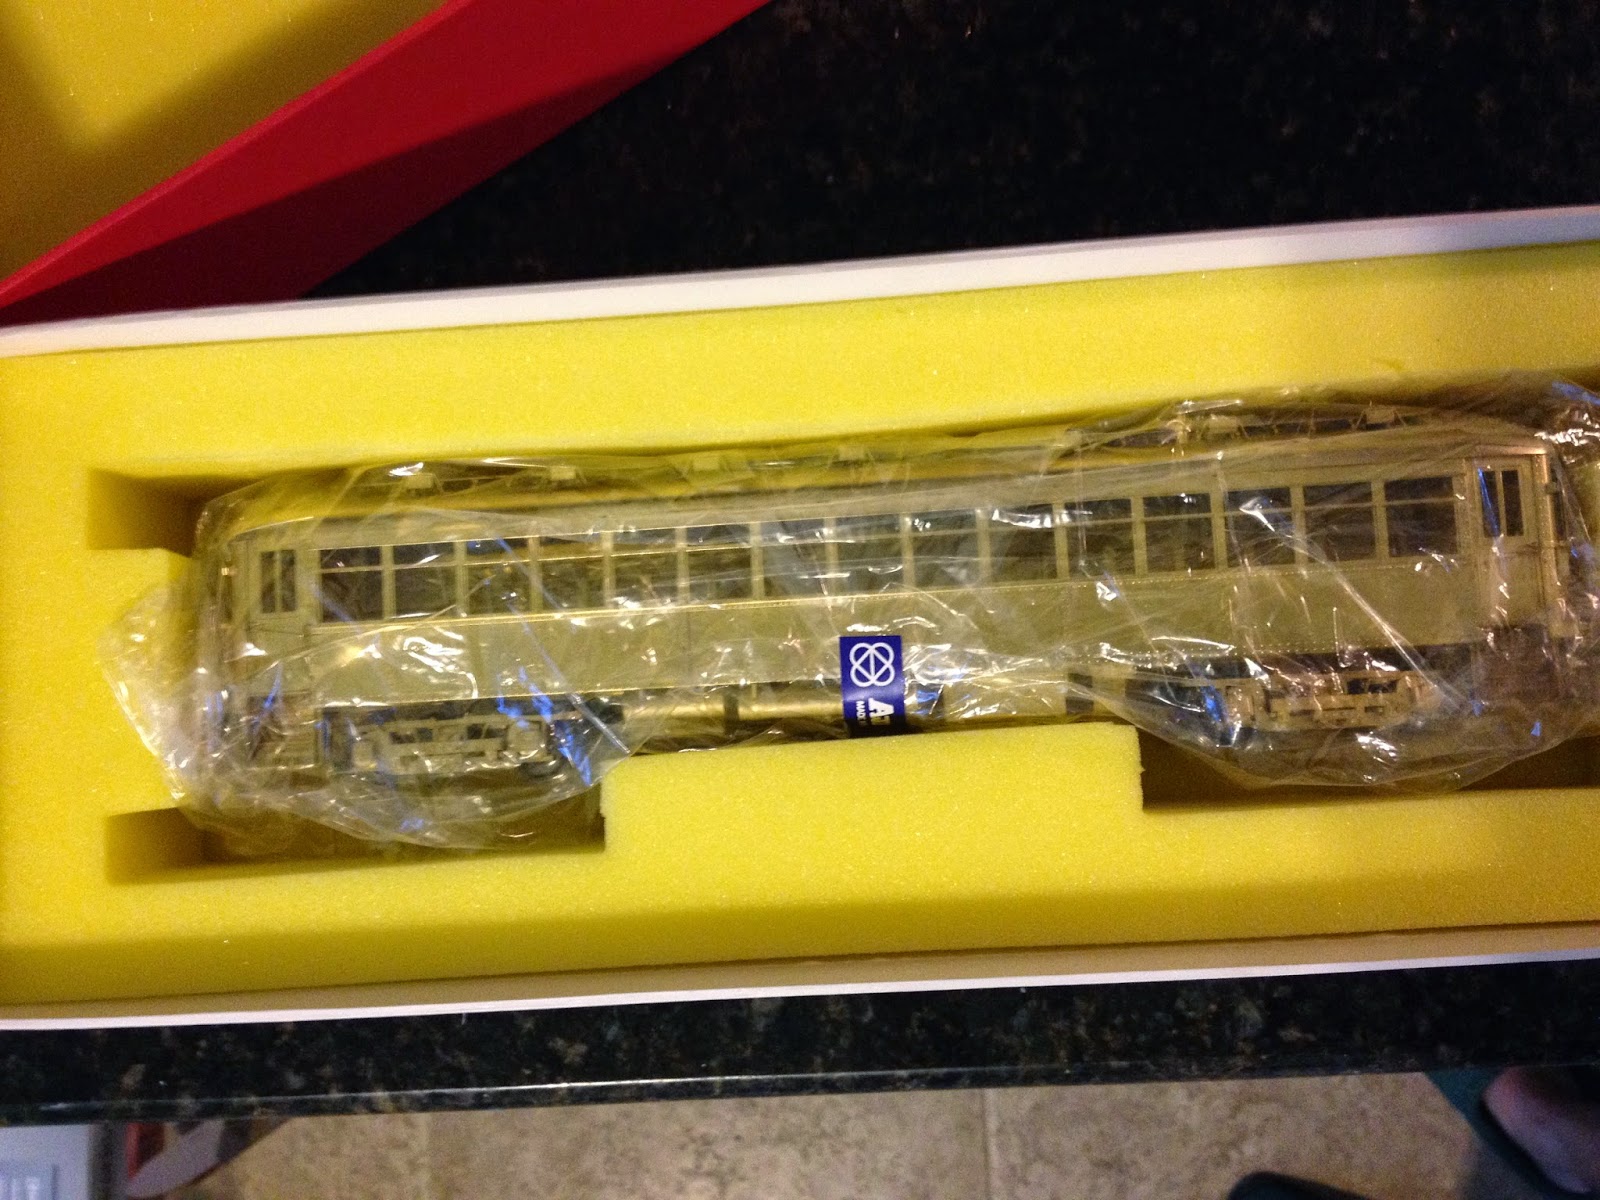
Still hasn't even been removed from the plastic wrap

I've decided that this car will be paired up with the Clouser coach I acquired last week as part of a Shore Line train. This car may remain unpowered, but whether I power it or not, I'll still have to replace the wheels for 2-rail operation. The Clouser coach and the high 700 will be part of a Skokie Valley train to Milwaukee. I am still waiting for the set of trucks (applicable for both of the latter cars) to arrive.

I also acquired a pair of pantographs for their shoes. And some CA&E trolley beams.

I got quite a bit of griping over the pantograph from my father. Something about "ruining" a pantograph just to get some parts. (For the record, the conscience of Dr. Frankenstein is undisturbed.) Besides, I later discovered that 1) the spring tension is rather weak (which would result in sub par wire contact) and 2) one of the pans is actually broken!

The shoe for this pantograph is a pretty close approximation for the shoes used on the CTA-designed pan-trolleys for the 1-50s and 5000 series assigned to the Skokie Swift. To use it for those two cars, the shoes on both pantographs would need to be removed and then the two halves (visually upper and lower in the image) sawed apart. Thus these two pans would yield the four pantograph shoes required for both models.

After leaving the meet, I attended the open house at Ed Halstead's Chicago & Utopia Railway. I didn't take any pictures, so unfortunately I don't have anything to show from the event. It was still a good time and several interesting models were run including a pair of early St. Petersburg Tram Collection Washington DC pre-PCCs and a South Shore coach. This was my first time seeing a model operating via pans and it helped me to visualize some of the operational differences of model pantographs versus trolley poles.

But enough talk. Time to get back to the shops and start working!

Sunday, March 8, 2015

Another Acquisition

Unfortunately the form 5 coupler mentioned in the previous post will not be ready in time for the O scale meet. There are still some aspects of the design that need to be resolved before I am able to print them. Given the amount of time before the O scale meet and associated open houses, even if the design was finished this very instant, the prototype still wouldn’t arrive in time.

There is, however, some good news to report. I attended a swap meet held at the DuPage County Fair Grounds in Wheaton earlier today. Generally these things don’t yield much (if anything) for O scale traction and I came expecting this. Ten minutes into the show I came across a Clouser North Shore Line coach body and you better believe I didn’t pass it up!

I also came across a pair of Yellow Book MTH 3200 series "L" cars. I’m not a 3-rail collector, although I do have several sets of the MTH 3200 series cars (excluding the pair that I intend to 2-rail). The Yellow Book cars are signed for Midway and this matches my four-car set. I figured that if I’m able to get my hands on a pair of the 3200 “silver” bodies, I wouldn’t need to cut up my current pair and if I got these I’d have the option to run an eight car Midway train with car numbers that aren’t duplicates. So I got these too.

The main victory of the day, though, was that Clouser body. The car represents one of the early steel coaches, either the 150-164 series or the nearly identical 165-169 series. (I haven’t yet decided which series this car will fall into.) Unlike the combine I got from eBay, the coach did not come with any detail parts. Also of not is that the car is one of the later castings of the kit. The roof of the combine is removable via a pair of small nuts that are tightened beneath the floor. The coach has a removable floor which is held in place by eight 2-56 screws. These are much harder to lose and far easier to replace than the tiny nuts on the combine!

Looks like projects are beginning to stack up on the Dunsel Line!

Sunday, December 7, 2014

Time to Focus

In the past two months I've continued working in Sketchup on a number of the projects outlined previously. None of them are, as of yet, finished. I was trying to take care of a few other things at the same time, but that cannot completely account for the lack of progress. After some consideration I've come to the conclusion that I've been trying to work on too many things at once. A distinct lack of focus has been a chronic problem of mine and this jumping from project to project has not helped the situation at all.

In order to get back on track, I'm going to work on one project at a time. The first order of business is getting back to the interior of the 3200-series cars. The last time I discussed this, I had recently gotten the prototype seat back from Shapeways and was relatively pleased with the result. That didn't last. As I discussed in that post, I left the possibility open that I might try my hand at making the scoop in the seats. Lo and belold! I did just that. (This is the hazard of never being satisfied with your own work.)

They aren't "perfect," but I am satisfied with how they look. (For now.) I haven't printed this design yet, although it did pass Shapeways' file initial and wall thickness checks when uploaded. That's good enough for me and I've gone ahead and begun designing the different types of seats found in the 3200-series. These are (from memory) as follows:

  • Single seat with handhold (pole on left)
  • Single seat with handhold (pole on right)
  • Single seat without handhold
  • Double seat with handhold
  • Double seat with handhold and ventilation box
  • Double seat without handhold
  • Wheelchair position double seat (flips up)
  • Longitudinal double seat with windbreak on left
  • Longitudinal double seat with windbreak on right

Shapeways digital preview of some of the pieces to be made. The scoops are more evident in this rendering than they would be in a screenshot from Google Sketchup.

The problem with simply printing the chairs is that a fair number of them are not self-supporting. They are (naturally) small and somewhat fragile. Trying to accurately mount something of this type to the floor of a model sounds like a chore and a half. I've thought about this for some time and eventually came up with something I'm willing to try.

The obvious answer is to print them as part of the car floor and be done with it. Unfortunately, this would be expensive to do (still earning vet tech wages) and the product is too large to be produced by the Frosted Ultra Detail printers. (The details are too fine to be printed in anything else.) My solution is a sort of compromise on this idea. I plan on dividing the car into three sections (front, middle rear) and designing the interiors in these sets. Each set will have all of its "furniture" (chairs, windbreaks, door pockets, etc.) created together and mounted onto a thin "surface floor." The three sections would then be placed end to end and mounted onto the real car floor (made of an inexpensive, but durable, material) and slid into the car body as one piece. Doing it this way solves the problem of mounting the chairs properly (without damaging them!), positioning them correctly, and also will allow me to make the grooves in the floor fairly easily. The grooves can also help to hide the separation lines between the three segments. We'll have to see how well this works and how expensive it turns out to be...

There has been a definite success with the printing. I sent off the updated version of the snowplow frames and received the finished product days later. These are a resounding success. I just have to fit them with the blades (to be made from index cards) and paint them.

These are remarkably crappy photos, but they do illustrate the point. This is a pair of snowplow frames, held back to back by sprues. They have a good amount of detail (which probably won't even be seen) and are decently strong. They're also reasonably flexible so they shouldn't break too easily.

I also have some new acquisitions to report: CA&E car 500 and a section of the Lake Street "L" structure. Both of these come to the Dunsel Line via the Chicago, Wheaton & Western (my father). He's beginning to focus on some other things and has come to the conclusion that he won't be doing anything with either of these, so he gave them to me.

The 500 (which could also be built into a North Shore Line 350-series streetcar—yeah right) is from a kit produced by Greg King. Currently it is completely unassembled, although it did come with a Q car power and trailer truck set. The downside is that the power truck is only set up for overhead operation. This will pose a slight problem as my (eventual) layout will be two rail, but for the time being it doesn't matter. (I'll probably also change out the power truck later.)

The Lake Street "L" structure is from a portion of the line with provision for only two tracks and the majority of support columns in the street and not anchored at the curb. The structure is somewhat old and slightly brittle. When removing it from my father's basement, I accidentally slightly tapped one of the columns against a wall and it broke off. (Apparently this has happened before.) I believe it is still structurally sound, so I'll fix it and post photos of it at a later date.

Wednesday, October 8, 2014

Time to Slow Down?

I try to keep my eyes open for another 1-50 series "L" car or two so that I can move forward with my Skokie Swift set. I'm also constantly on the lookout for more CA&E rolling stock. And yet I don't find either of these, but I manage within three weeks to acquire two O scale North Shore Line cars. The new car arrived today.

It's a 250-256 series combine which was produced by Bill Clouser. The quality (which is a given) is exceptional. The body is missing equipment (it was made that way) but the model came with—as far as I can tell—a complete set of exterior detail pieces. The only thing it's missing are poles, motors, trucks, and an interior. I'll need to determine the general era of the car, given the ventilators on the roof.

A side-by-side comparison of the ends of the two cars.

The roof doesn't seem to come off. Neither does the car floor. I haven't tried too hard out of fear of damaging the model.

Something else also arrived today.

Yup. More North Shore stuff. This time a pair of Walthers North Shore car ends. Still in the packaging. The printed price is $1.95. That's not quite what I paid! Currently I have no plans for these, but, you never know. Definitely could be useful down the road.

Thursday, October 2, 2014

Now arriving on Track 4...

The North Shore car arrived last week. Here it is!

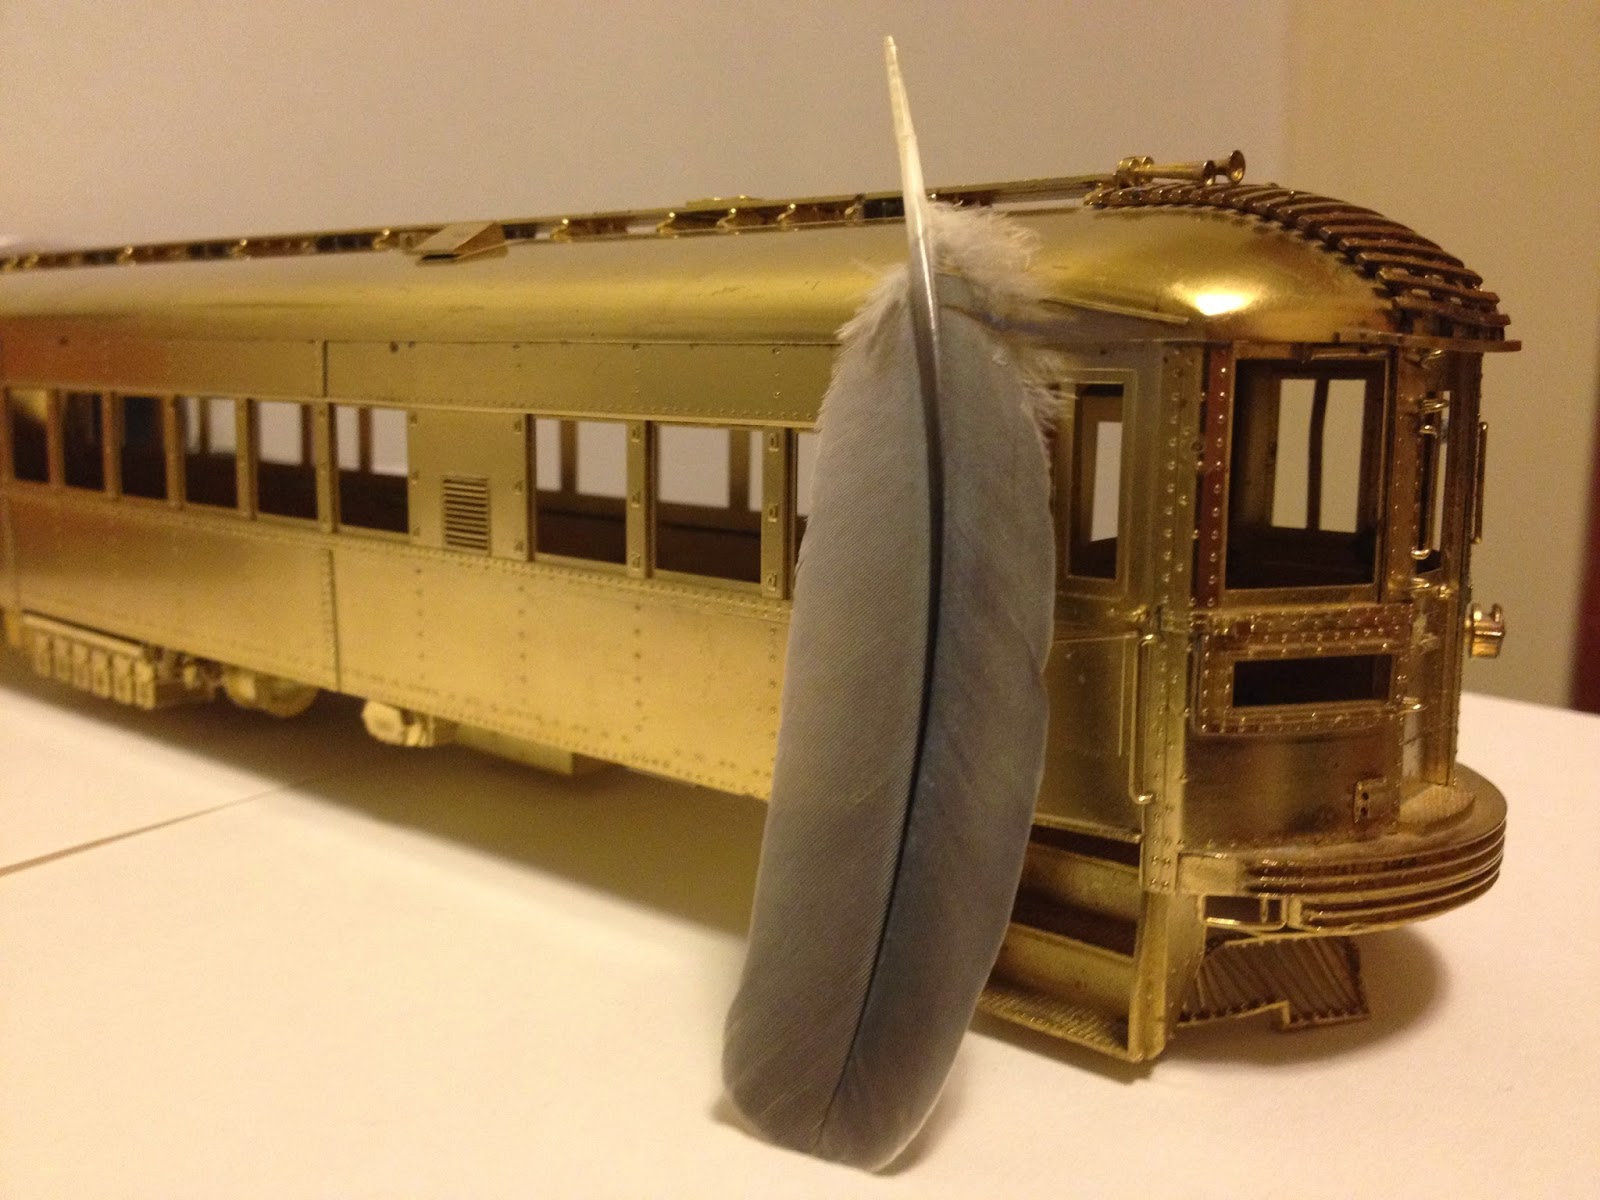
Despite its flaws—including a bent pilot—I'm quite satisfied. After reviewing the CERA bulletins, I've determined that this is a model of the 737-776 series of cars as modernized, but not as a Silverliner. These cars were actually from two separate series built by two different manufacturers at different times, but having almost identical specifications. 737-751 were built by Pullman in 1928. The rest were produced by Standard in 1930. I haven't picked a series yet (although I'm leaning toward the Standard-built cars) but I do know that I will not be giving it the number of a preserved car. I like the concept of recreating and preserving (in a small way—no pun intended) something that was lost.

The car is missing a few things. This includes (but is not limited to) trucks, couplers, poles, and trolley hooks. Also, on one corner a small bracket seems to have been knocked off. I believe this is supposed to hold either flags or lanterns. The more learned will have to comment.

The hole is where the missing bracket is supposed to be.

A little known fact about these cars is that while being modernized, the trucks and poles were removed. The cars were then painted in a rather striking all-brass livery. The area around the shops was also home to an American species of roc that was long believed to have been mythical. (The "legend" of these giant birds were the inspiration for Baby Huey.) The birds have since gone extinct, but I have managed to locate a rare color photograph depicting this situation. The Smithsonian will no doubt be interested in my finding.

Sunday, September 21, 2014

Success on Two Fronts

Okay, so this update is long overdue. In the intervening weeks I have had some successes with my models and my "layout." I have come to the decision (largely in part because of the purchase of the 2000-series cars) that the Dunsel Line will not be a traditional trolley layout. It will be a two-rail layout equipped with dummy third rail. This will allow operation of CA&E, North Shore, and "L" equipment even if the cars (such as the 2000s) are not equipped with trolley poles or pantographs. This will necessitate the pole- or pan-equipped cars to built to accommodate two modes of running, as they should be. This does come with a downside.

Prototypical placement of the third rail on the "L" has the top of the third rail 6½ inches above the top of the running rail and 20-1/8 inches from the inside edge of the running rail to the center line of the third rail. Contact with the third rail is made by a metal shoe (or a paddle in the case of very early AE&C cars). Contact with the third rail is made by gravity: the shoe naturally hangs and then glides across the surface of the rail when present. The problem here is that most on models, the shoe has been made in the free hanging or "down" position. This is fine for trolley operation as when under wire, the shoes should hang freely. With prototypical third rail placement, the shoe now hangs too low for operation. The MTH "L" cars have the shoe in the up or "on rail" position. This works well for prototypical placement unless the third rail is on the non visible side of the model or at gaps. In these situations the shoe isn't hanging when it should be.

A trolley beam on a St. Petersburg 2000-series car. The shoe is depicted as hanging free. This would collide with a prototypically placed third rail.

MTH made the shoe in the "on rail" position.

There are three ways to work this problem. The first is to use the commercially available trolley beams in the free hanging position and adapt the height of the third rail accordingly. The other is to use the on rail position and place the third rail according to where it will be seen by the viewer. I'm not entirely satisfied by either of these options.

The third option is, if at all possible, is to create a trolley beam with a third rail shoe that functions like the prototype so that it can glide or dangle as need be. I'm a neurotic freak so this sounds extremely satisfying. I had this idea in the past, but dismissed it due to my inability to construct such a small thing effectively. But now I can have things 3D printed! And according to the specifications on Shapeways' site, many materials do allow for moving parts if proper clearance is built into the design. Looks like I've got a new project...

Granted, this won't take into account the placement in the third rail given the difference in scales (1/48 vs. the 1/45 for the MTH cars) but I'll just have to live with it.

This actually leads to the first of my successes. The prototype seat for the 3200-series cars arrived from Shapeways on Monday and I’m pleased with the results.

This took far longer than I’d expected and was also fraught with no small amount of frustration. The first problem was getting the angle of the seat back to my own satisfaction (picture a weirdo riding the Ravenswood messing around with perfectly normal seats with a protractor and a crude, improvised plumb bob). The next (and far more frustrating) bit was to create the handhold on the back of the seat.

I was very much relieved to discover that the handholds on the 3200s are much simpler than their counterparts on the 22-, 24-, and 2600-series cars. Until I tried to produce them, that is. The process involves making an appropriately sized circle which will be the “pipe” in question and then drawing a curved line representing the path of the pipe. In this case, the path went up from the circle, curved to one side, continued horizontally, and then curved down to the same height at which it started. Once that path is created and placed on the appropriate plane (another interesting quest in of itself) and positioned with the start at the center of the circle, the “follow me tool” is used to extrude the circle along the specified path. Simple. Or not, as I kept getting error messages that people in Youtube videos never seemed to get.

Once I realized that the problem was that some combination of Google Sketchup and my computer was being a lazy pile of rancid horse turds, the project moved along swiftly. (No Skokie pun intended.) My problem was that I was trying to create the curve in 1/45 scale. This was simply too small for the program to handle. It wouldn’t do the math. However, once I scaled up the curve/circle combination to a large enough size, I was blessed with numerous beautiful curved pipe segments. Armed with this, I used the scale tool to reduce the piece to the appropriate size, and voila! (Apparently Sketchup has no problem rendering such a small thing, it just doesn’t want to draw it.)

Once that hurdle was cleared, I saved my file, exported it as a .dae (which is a file type native to Sketchup 8 and can be read by Shapeways) and sent the .dae off to be printed. And like that, it was done.

The question I keep getting asked when I’ve shown this thing around is, why did you only make one? I wanted to produce one seat just to determine what the end product would look like on a simple design and then rework my design from there. A single transverse seat seemed like the best option. This was printed in “Frosted Ultra Detail.” There are other (cheaper) alternatives available, however none of the other materials were sufficient to produce the detail included and wouldn’t pass some of the initial checks.

There was a slight (and I do mean slight) problem in the printing process. I didn’t include the stanchion that connects to the handhold on the back of the seat, but I did include the connection for it. This is the little nodule in the corner. This is an object that is shaped almost like an inverted, blunted, ogive cone. It is quite diminutive, but still bigger in diameter than the bar itself. The problem is that it didn’t print fully. There’s a “gap” in the back. Fortunately, it is so tiny that it isn’t very noticeable.

Now that I’ve seen what it looks like, I can say I like it and I can go ahead and make up the other variants. (Assuming I don’t go back and try to add the curves to the seat back and “cushion.”)

This still leaves the problem of the stanchions themselves. Still haven’t figured that one out just yet.

The second success is that the Dunsel Line has acquired a new piece of rolling stock! I am still waiting for it to arrive, but it is a high numbered 700 North Shore Line car in brass. (My knowledge of the North Shore isn’t what it should be, so I can’t identify the specific series until I consult my father’s CERA bulletins.)

This is my first North Shore model. The model didn’t come with trucks, trolley poles, or even a box. (This is why I it wasn’t identified when I purchased it.) What it does have is a few dents on the roof and some tarnish in a few spots, but these things should be easily fixed.

The plan here is to paint it in the final variant of the North Shore’s green and red and equip it with appropriate Q Car Company trucks insulated for two rail operation. Power will be supplied by a pair of NWSL Magic Carpets. A selector switch will, of course, have to be installed for two rail or trolley power. Poles will also be Q Car.

Exciting times ahead!

Saturday, July 19, 2014

Patience Pays Off: New Equipment!

On Thursday I acquired a pair of St. Petersburg Tram Collection 2000-series "L" cars. The particular pair is 2153-2154. (Initially I liked the random numbers for the set, then later realized that there was nothing random about that pair at all.)

I first laid eyes on these cars about eight years ago as they sat illuminated behind protective glass on the shelves of Chicagoland Hobbies. At the time I was an unemployed college student trying to squeeze pocket lint into pennies so that I could actually eat after buying textbooks. The $800+ price tag meant that, while extremely beautiful, these particular cars were not in my future. Someone else would buy them and that would be that.

Fast forward about seven and a half years. While doing a casual run-through of my usual search terms on eBay I happened to see a pair of SPTC 2000-series cars for sale. Lo and behold! they were the same cars I'd seen years earlier in the store. They were still to expensive for me so I let them be. They continually popped up in my eBay runs for the next few months but never thought about them until earlier this week when I noticed that the price had dropped to the upper limits of what I'd be willing to spend. I quickly conferred with my father (who also has a pair of SPTC 2000s) and determined that the two sets had different car numbers and were both signed "Lake B." With the possibility of some day running a four car train now on the table, I wasted no time in acquiring them. (So much for getting that electrical outlet fixed!)

The cars came with a Wagner power truck and trailer for a PCC. I almost certainly won't use this to power the 2000s, but I may use it on some PCC that crosses my path down the line. It is also entirely possible that I will sell or trade them for something else.

These cars will be 2-railed and equipped with a DCC decoder. Unlike their full scale versions, they will not be equipped with trolley poles.